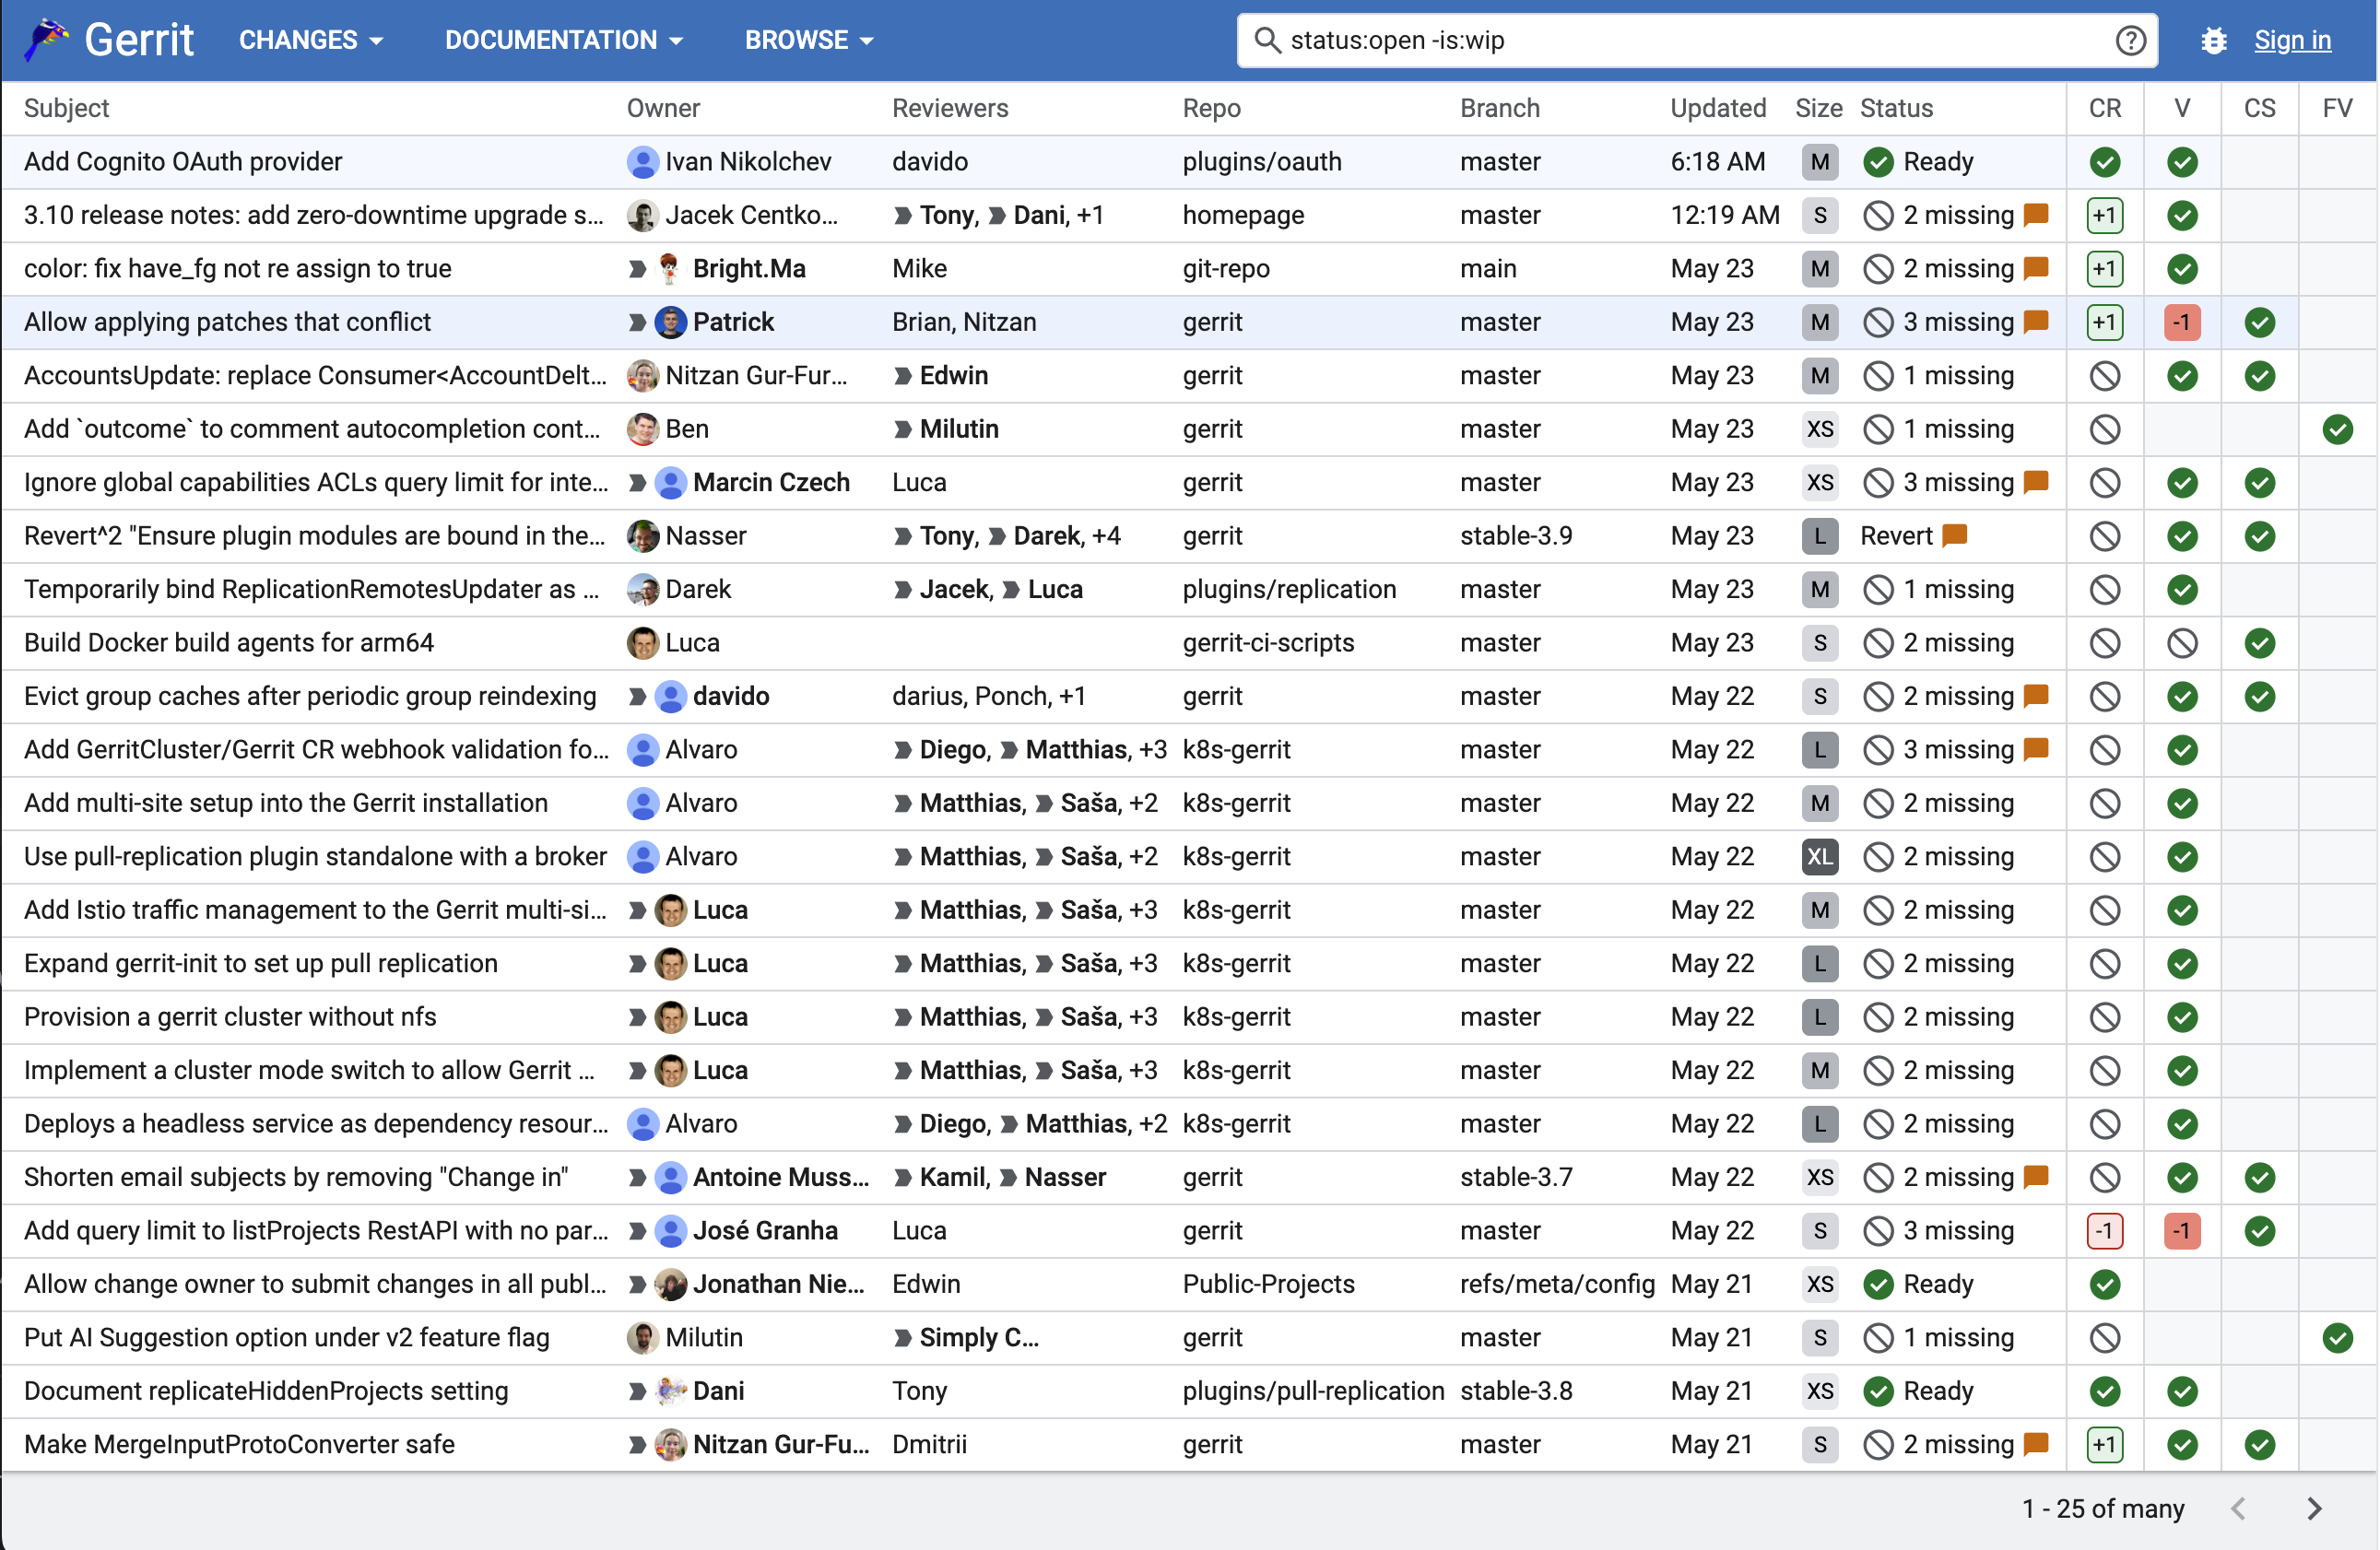
Gerrit是Google为Android系统开发的Code Review系统,内部同时集成了git服务,UI界面长这样:
 下面我们就来介绍,如何在一台unbuntu系统上安装gerrit服务,作为私有git服务使用。
安装
下面是本次安装的网络拓扑结构:
环境:ubuntu24.04,gerrit-3.10.0,nginx-1.24.0
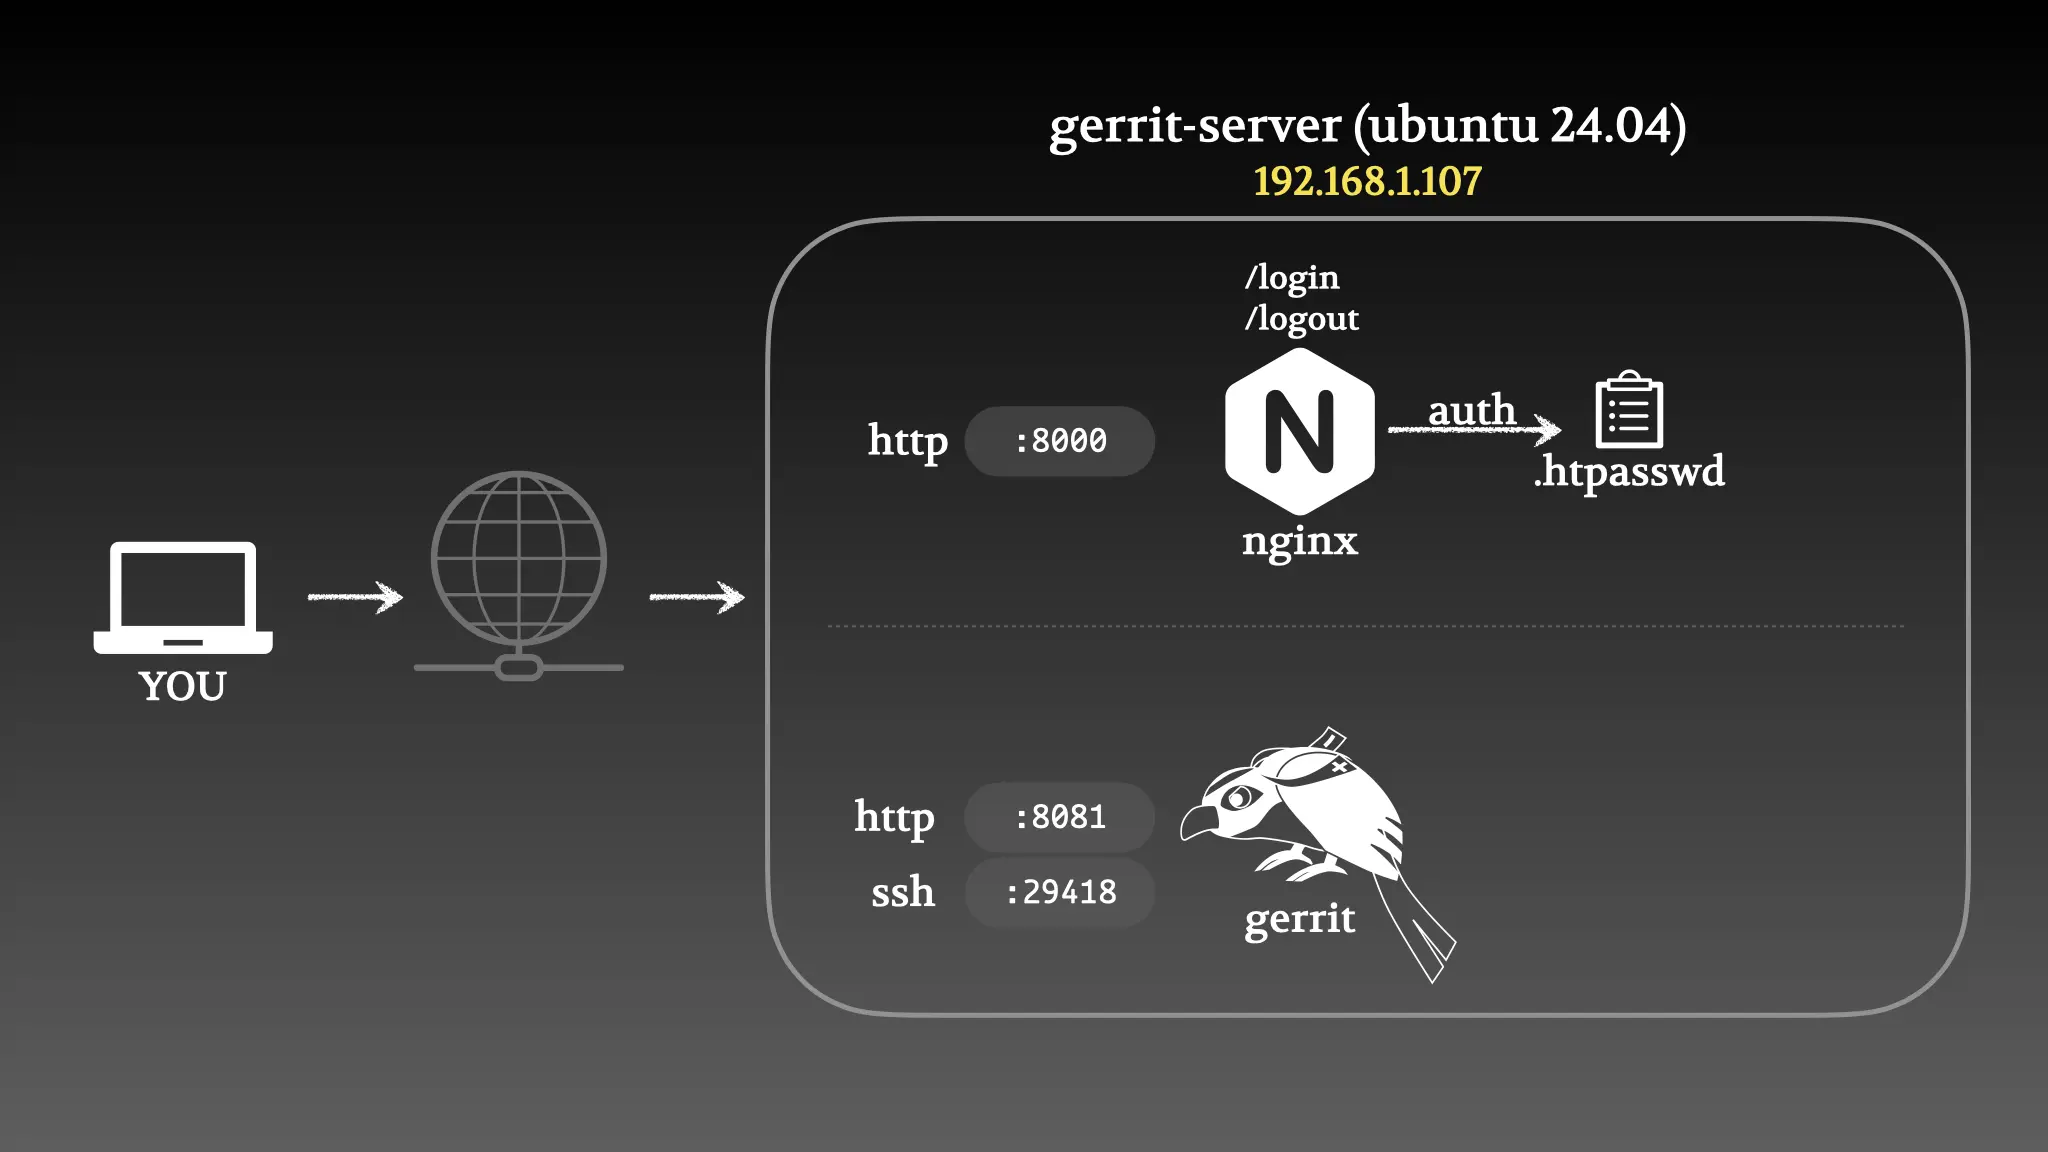
- nginx:提供用户认证服务使用,使用Http Basic Auth机制,提供login和logout功能;
- .htpasswd文件:提供用户名和密码,为nginx提供用户信息;
- gerrit:提供代码review和git托管服务;
- 8081端口:HTTP协议,提供代码review页面;
- 29418端口:ssh服务,提供git服务;
使用下面的命令安装gerrit以及依赖包:
1
2
3
4
5
6
7
8
9
|
## 安装依赖
sudo apt install -y openjdk-21-jdk nginx apache2-utils

## 创建gerrit用户
sudo adduser gerrit
sudo su gerrit

## 下载安装包
wget https://gerrit-releases.storage.googleapis.com/gerrit-3.10.0.war
|
## 安装依赖
sudo apt install -y openjdk-21-jdk nginx apache2-utils
## 创建gerrit用户
sudo adduser gerrit
sudo su gerrit
## 下载安装包
wget https://gerrit-releases.storage.googleapis.com/gerrit-3.10.0.war
初始化
1
2
3
|
## 初始化gerrit数据目录
export GERRIT_SITE="$HOME/gerrit-data"
java -jar gerrit-3.10.0.war init -d $GERRIT_SITE
|
## 初始化gerrit数据目录
export GERRIT_SITE="$HOME/gerrit-data"
java -jar gerrit-3.10.0.war init -d $GERRIT_SITE
参考下面的配置:${GERRIT_SITE}/etc/gerrit.config
 1
 2
 3
 4
 5
 6
 7
 8
 9
10
11
12
13
14
15
16
17
18
19
20
21
22
23
24
25
26
27
|
## ${GERRIT_SITE}/etc/gerrit.config
[gerrit]
	basePath = git
	canonicalWebUrl = http://192.168.1.107:8081
	serverId = 59bd29f4-c852-4b3e-9ae4-2e535e733969
[container]
	javaOptions = "-Dflogger.backend_factory=com.google.common.flogger.backend.log4j.Log4jBackendFactory#getInstance"
	javaOptions = "-Dflogger.logging_context=com.google.gerrit.server.logging.LoggingContext#getInstance"
	user = gerrit
	javaHome = /usr/lib/jvm/java-21-openjdk-amd64
[index]
	type = lucene
[auth]
	type = HTTP
	emailFormat = {0}@ticktechman.tech
	loginUrl = http://192.168.1.107:8000/login
	logoutUrl = http://192.168.1.107:8000/logout
[receive]
	enableSignedPush = false
[sendemail]
	smtpServer = localhost
[sshd]
	listenAddress = *:29418
[httpd]
	listenUrl = http://*:8081/
[cache]
	directory = cache
|
## ${GERRIT_SITE}/etc/gerrit.config
[gerrit]
basePath = git
canonicalWebUrl = http://192.168.1.107:8081
serverId = 59bd29f4-c852-4b3e-9ae4-2e535e733969
[container]
javaOptions = "-Dflogger.backend_factory=com.google.common.flogger.backend.log4j.Log4jBackendFactory#getInstance"
javaOptions = "-Dflogger.logging_context=com.google.gerrit.server.logging.LoggingContext#getInstance"
user = gerrit
javaHome = /usr/lib/jvm/java-21-openjdk-amd64
[index]
type = lucene
[auth]
type = HTTP
emailFormat = {0}@ticktechman.tech
loginUrl = http://192.168.1.107:8000/login
logoutUrl = http://192.168.1.107:8000/logout
[receive]
enableSignedPush = false
[sendemail]
smtpServer = localhost
[sshd]
listenAddress = *:29418
[httpd]
listenUrl = http://*:8081/
[cache]
directory = cache
初始化nginx
参考下面的配置:/etc/nginx/conf.d/gerrit.conf
 1
 2
 3
 4
 5
 6
 7
 8
 9
10
11
12
13
14
15
16
17
18
19
20
21
22
23
24
25
26
27
28
29
30
31
32
33
|
## /etc/nginx/conf.d/gerrit.conf
server {
	listen 8000 default_server;
	listen [::]:8000 default_server;

	root /var/www/html;

	# Add index.php to the list if you are using PHP
	index index.html index.htm index.nginx-debian.html;

	server_name _;
	location / {
		# First attempt to serve request as file, then
		# as directory, then fall back to displaying a 404.
		try_files $uri $uri/ =404;
		proxy_pass        http://127.0.0.1:8081/;
		proxy_set_header  X-Forwarded-For $remote_addr;
		proxy_set_header  Host $host;
		auth_request /login;
	}
	location /login {
		# First attempt to serve request as file, then
		# as directory, then fall back to displaying a 404.
		auth_basic "Gerrit Code Review";
		auth_basic_user_file /etc/nginx/.htpasswd;
		proxy_pass        http://127.0.0.1:8081;
		proxy_set_header  X-Forwarded-For $remote_addr;
		proxy_set_header  Host $host;
	}
	location /logout {
		return 302 http://192.168.1.107:8081;
	}
}
|
## /etc/nginx/conf.d/gerrit.conf
server {
listen 8000 default_server;
listen [::]:8000 default_server;
root /var/www/html;
# Add index.php to the list if you are using PHP
index index.html index.htm index.nginx-debian.html;
server_name _;
location / {
# First attempt to serve request as file, then
# as directory, then fall back to displaying a 404.
try_files $uri $uri/ =404;
proxy_pass http://127.0.0.1:8081/;
proxy_set_header X-Forwarded-For $remote_addr;
proxy_set_header Host $host;
auth_request /login;
}
location /login {
# First attempt to serve request as file, then
# as directory, then fall back to displaying a 404.
auth_basic "Gerrit Code Review";
auth_basic_user_file /etc/nginx/.htpasswd;
proxy_pass http://127.0.0.1:8081;
proxy_set_header X-Forwarded-For $remote_addr;
proxy_set_header Host $host;
}
location /logout {
return 302 http://192.168.1.107:8081;
}
}
配置完成后,重启nginx服务和gerrit服务
1
2
|
sudo service nginx restart
${GERRIT_SITE}/bin/gerrit.sh restart
|
sudo service nginx restart
${GERRIT_SITE}/bin/gerrit.sh restart
测试
添加用户
1
2
3
4
5
|
## 创建管理员用户
sudo htpasswd -b -c /etc/nginx/.htpasswd admin admin123

## 创建普通用户
sudo htpasswd -b /etc/nginx/.htpasswd ticktech ticktech123
|
## 创建管理员用户
sudo htpasswd -b -c /etc/nginx/.htpasswd admin admin123
## 创建普通用户
sudo htpasswd -b /etc/nginx/.htpasswd ticktech ticktech123
打开浏览器,登陆http://192.168.1.107:8081,点击右上角的Sign in登陆:
- 管理员登陆:在弹出的对话框中输入上面
admin用户名和密码(注意这里先使用admin用户登陆,因为gerrit默认第一个登陆的用户为管理员账户)。
- 普通用户登陆:接着使用第二个用户
ticktech登陆,作为一个普通用户。
这里需要注意,在登陆第二个用户前,需要先删除本地浏览器的历史记录(缓存和cookies),否则会一直以第一个用户登陆的状态进入系统,这是使用HTTP Basic Auth的缺陷。
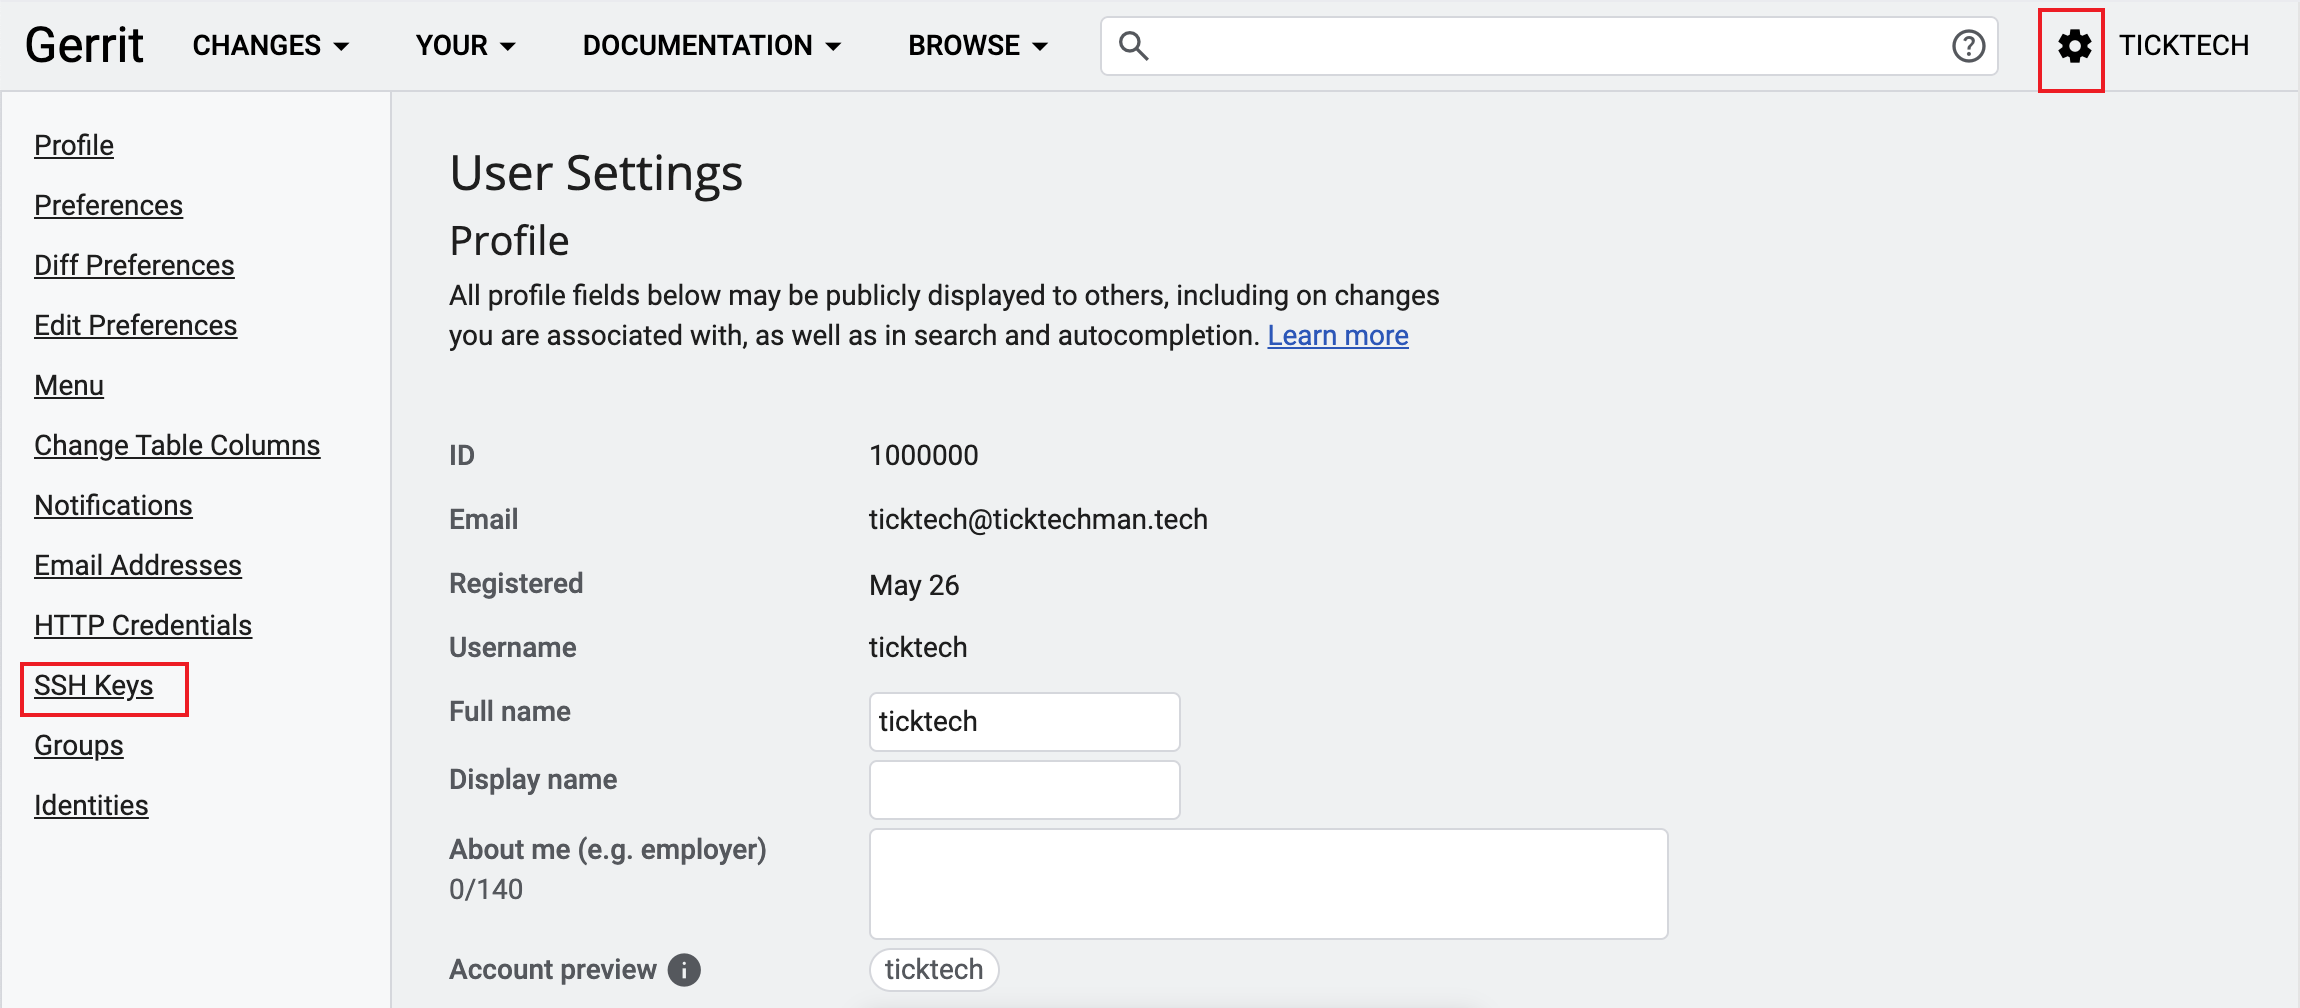
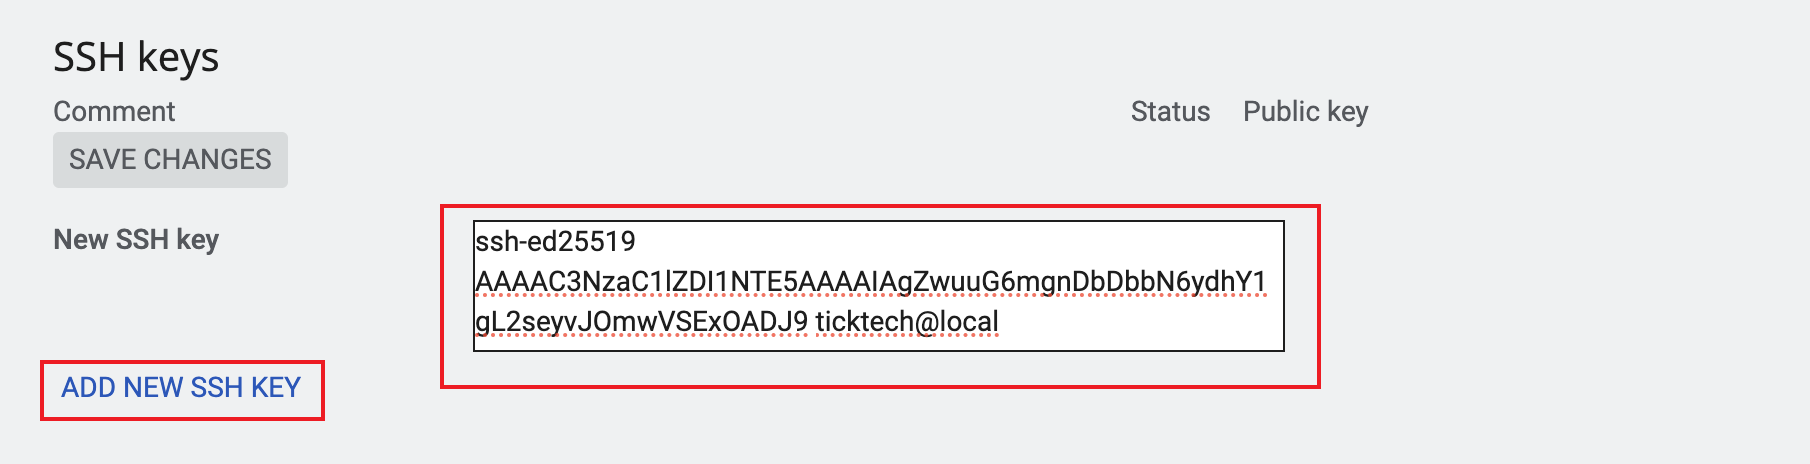
新用户登陆后,需要先添加ssh-key才能下载代码:
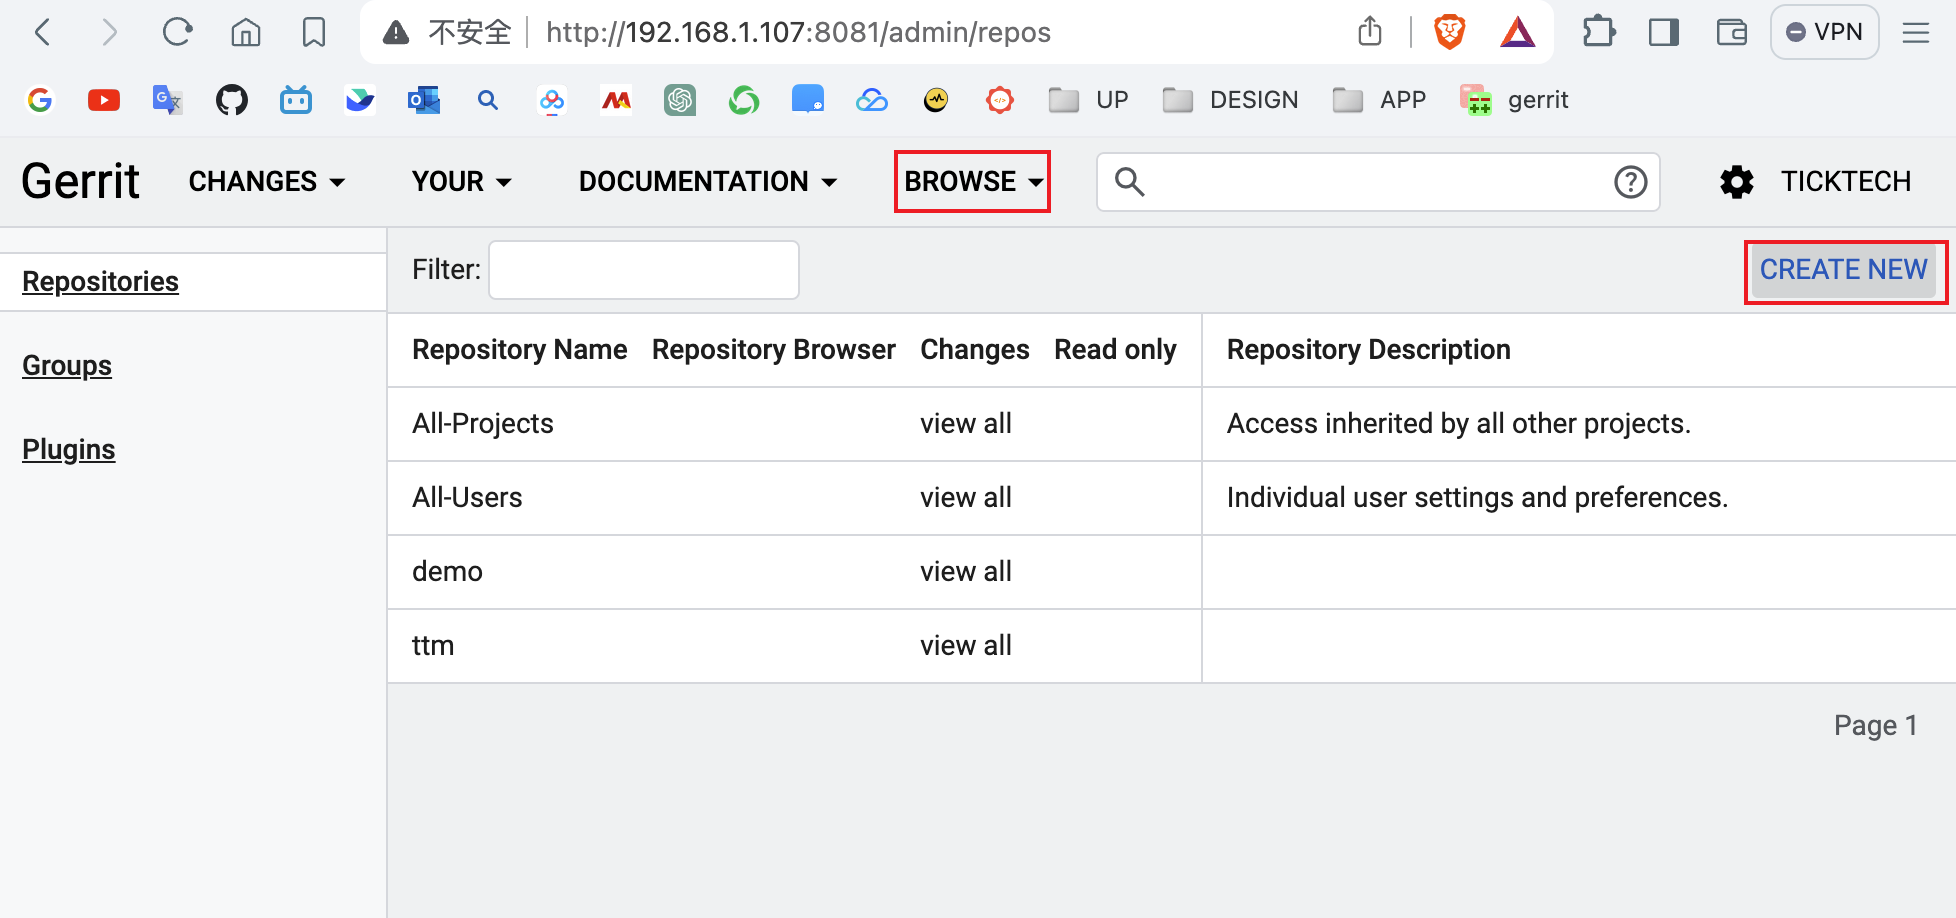
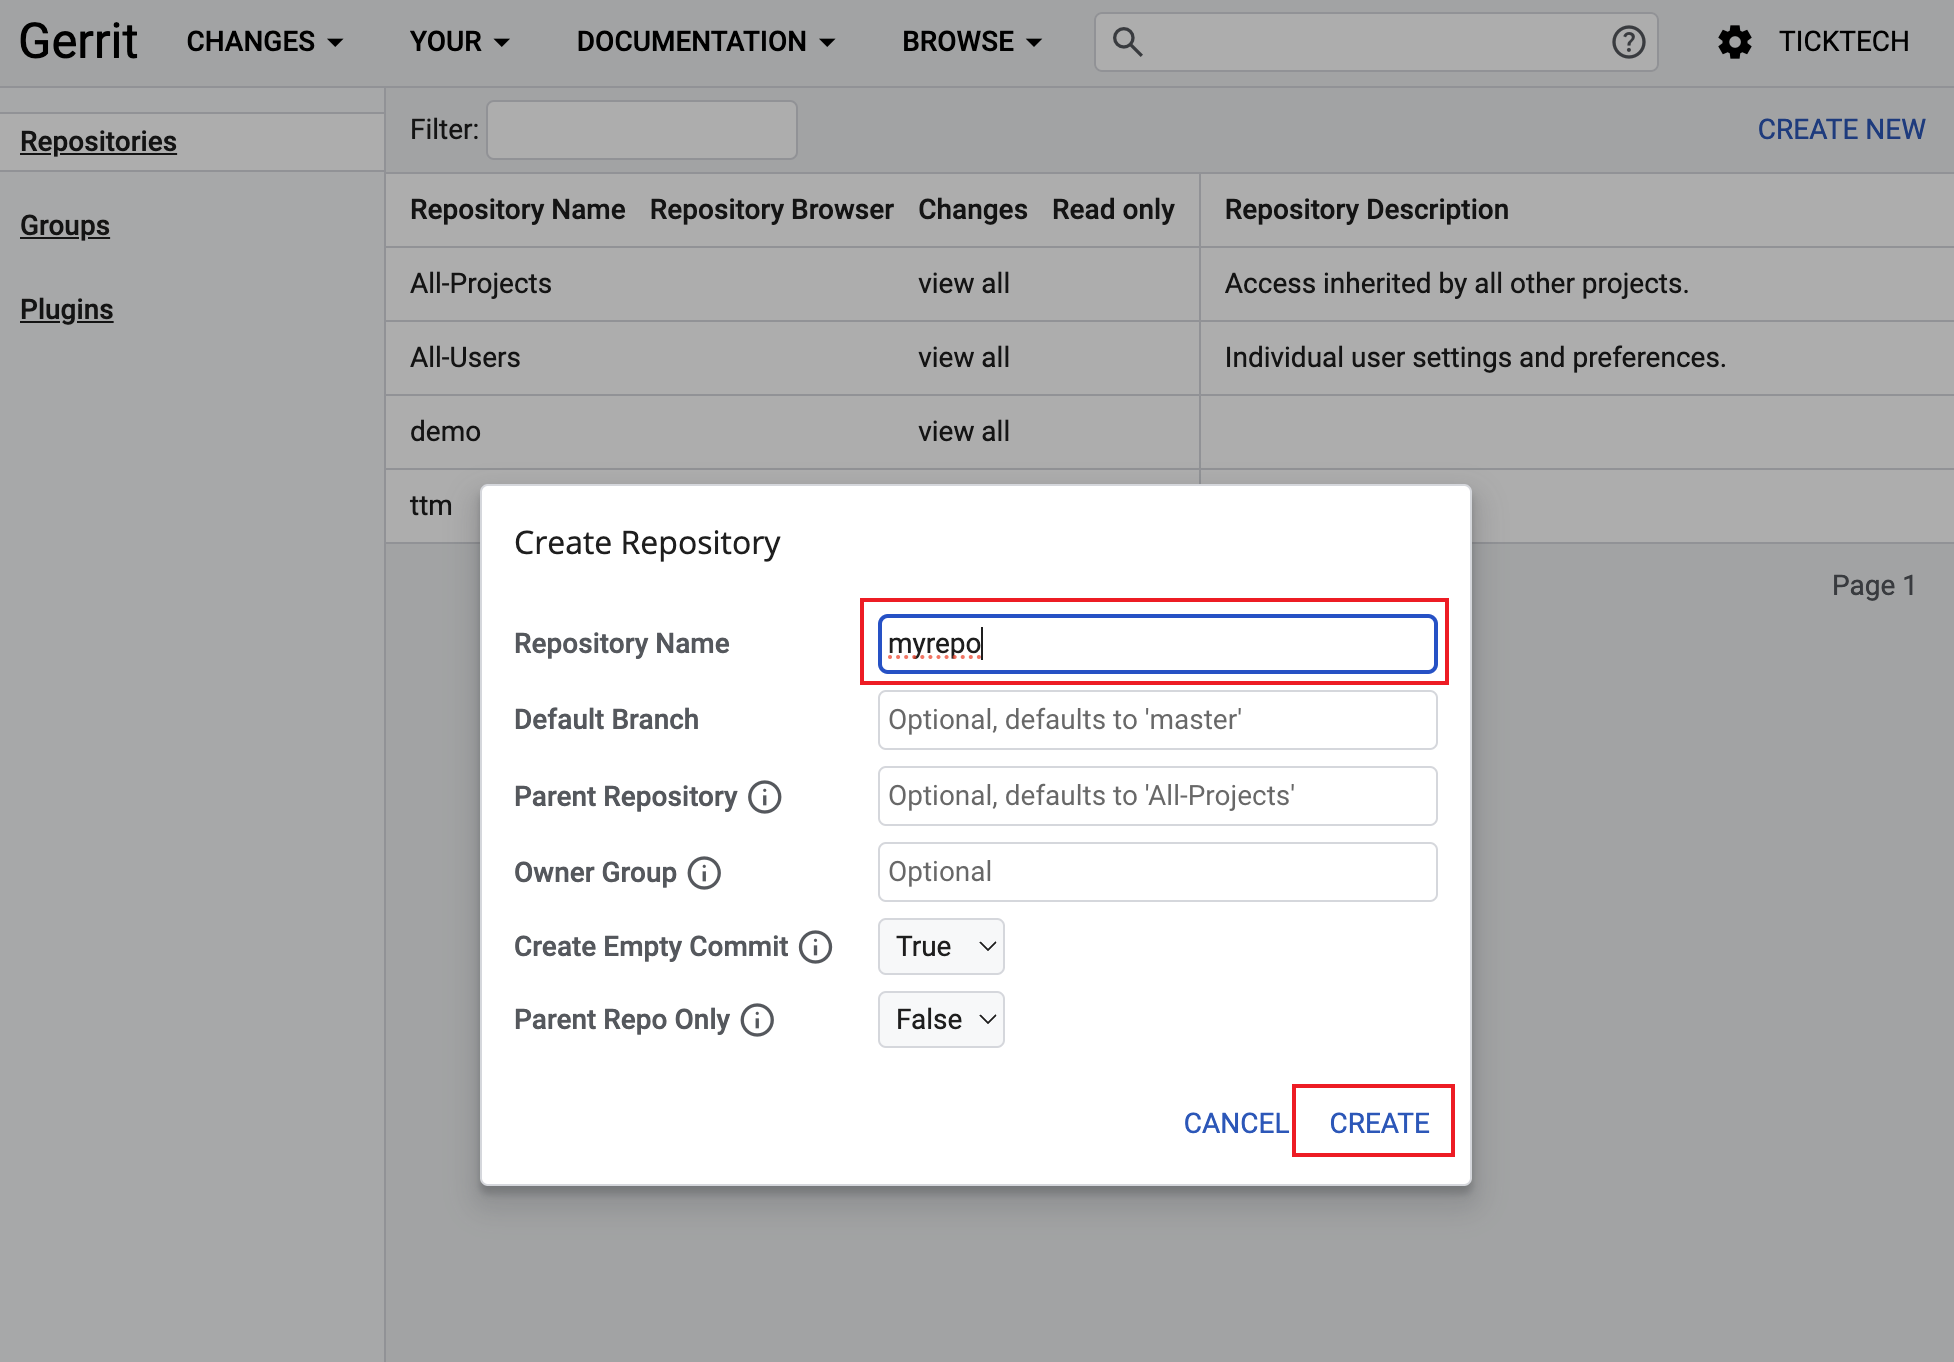
新建仓库
点击菜单:[BROWSE] > [Repositories] > [CREATE NEW]
代码下载&提交
 1
 2
 3
 4
 5
 6
 7
 8
 9
10
11
12
13
|
## 下载代码
git clone ssh://ticktech@192.168.1.107:29418/myrepo.git
cd myrepo/

## 配置commit-msg钩子,为了生成change-id,这个是gerrit需要的
wget http://192.168.1.107:8081/tools/hooks/commit-msg -O .git/hooks/commit-msg

## coding

## 提交代码,注意这里提交的远端分支为refs/for/master
git add .
git commit
git push origin HEAD:refs/for/master
|
## 下载代码
git clone ssh://ticktech@192.168.1.107:29418/myrepo.git
cd myrepo/
## 配置commit-msg钩子,为了生成change-id,这个是gerrit需要的
wget http://192.168.1.107:8081/tools/hooks/commit-msg -O .git/hooks/commit-msg
## coding
## 提交代码,注意这里提交的远端分支为refs/for/master
git add .
git commit
git push origin HEAD:refs/for/master
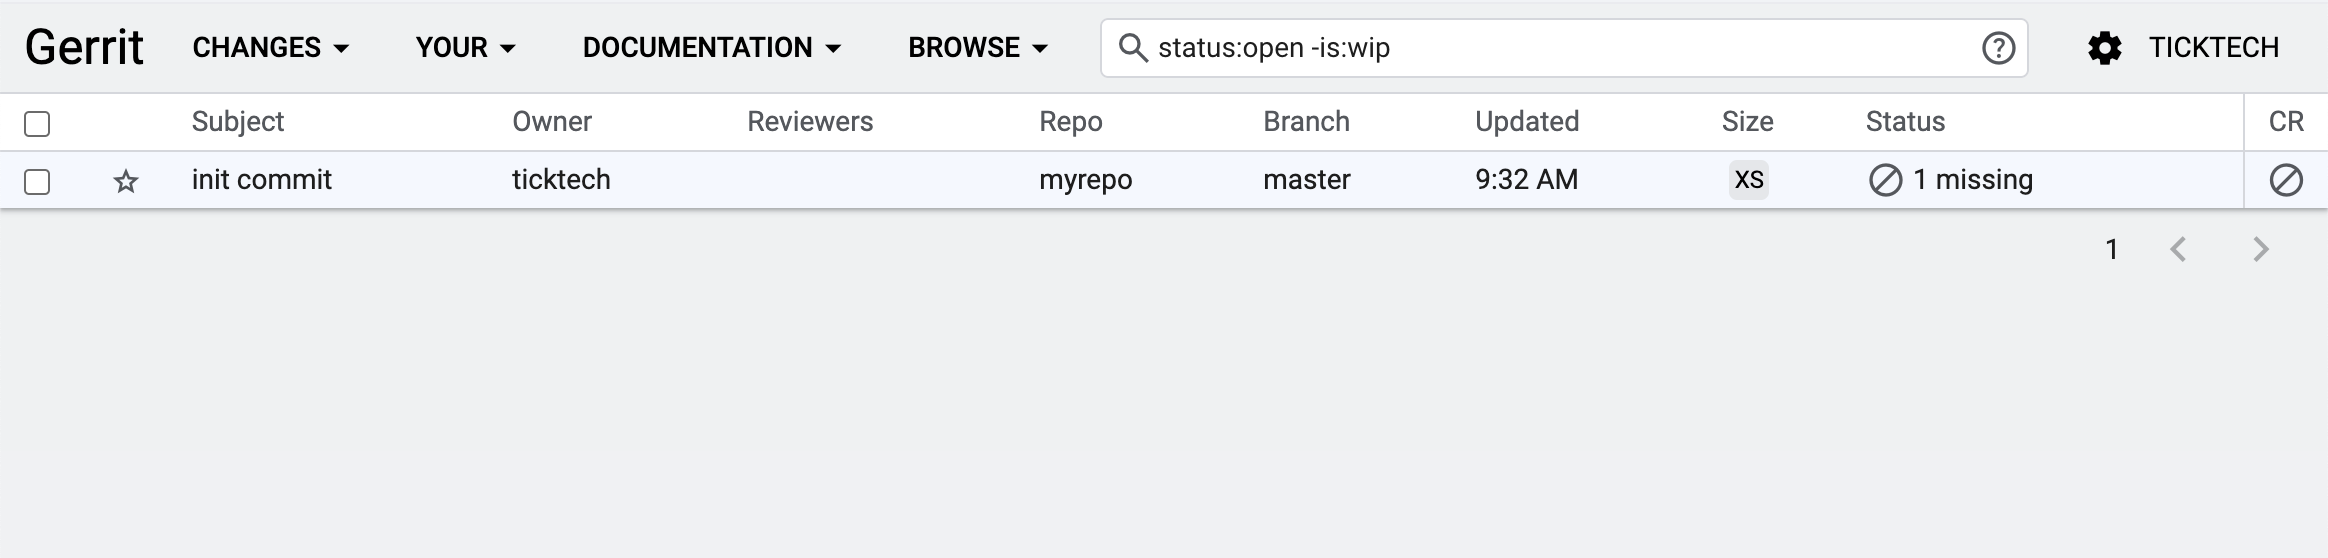
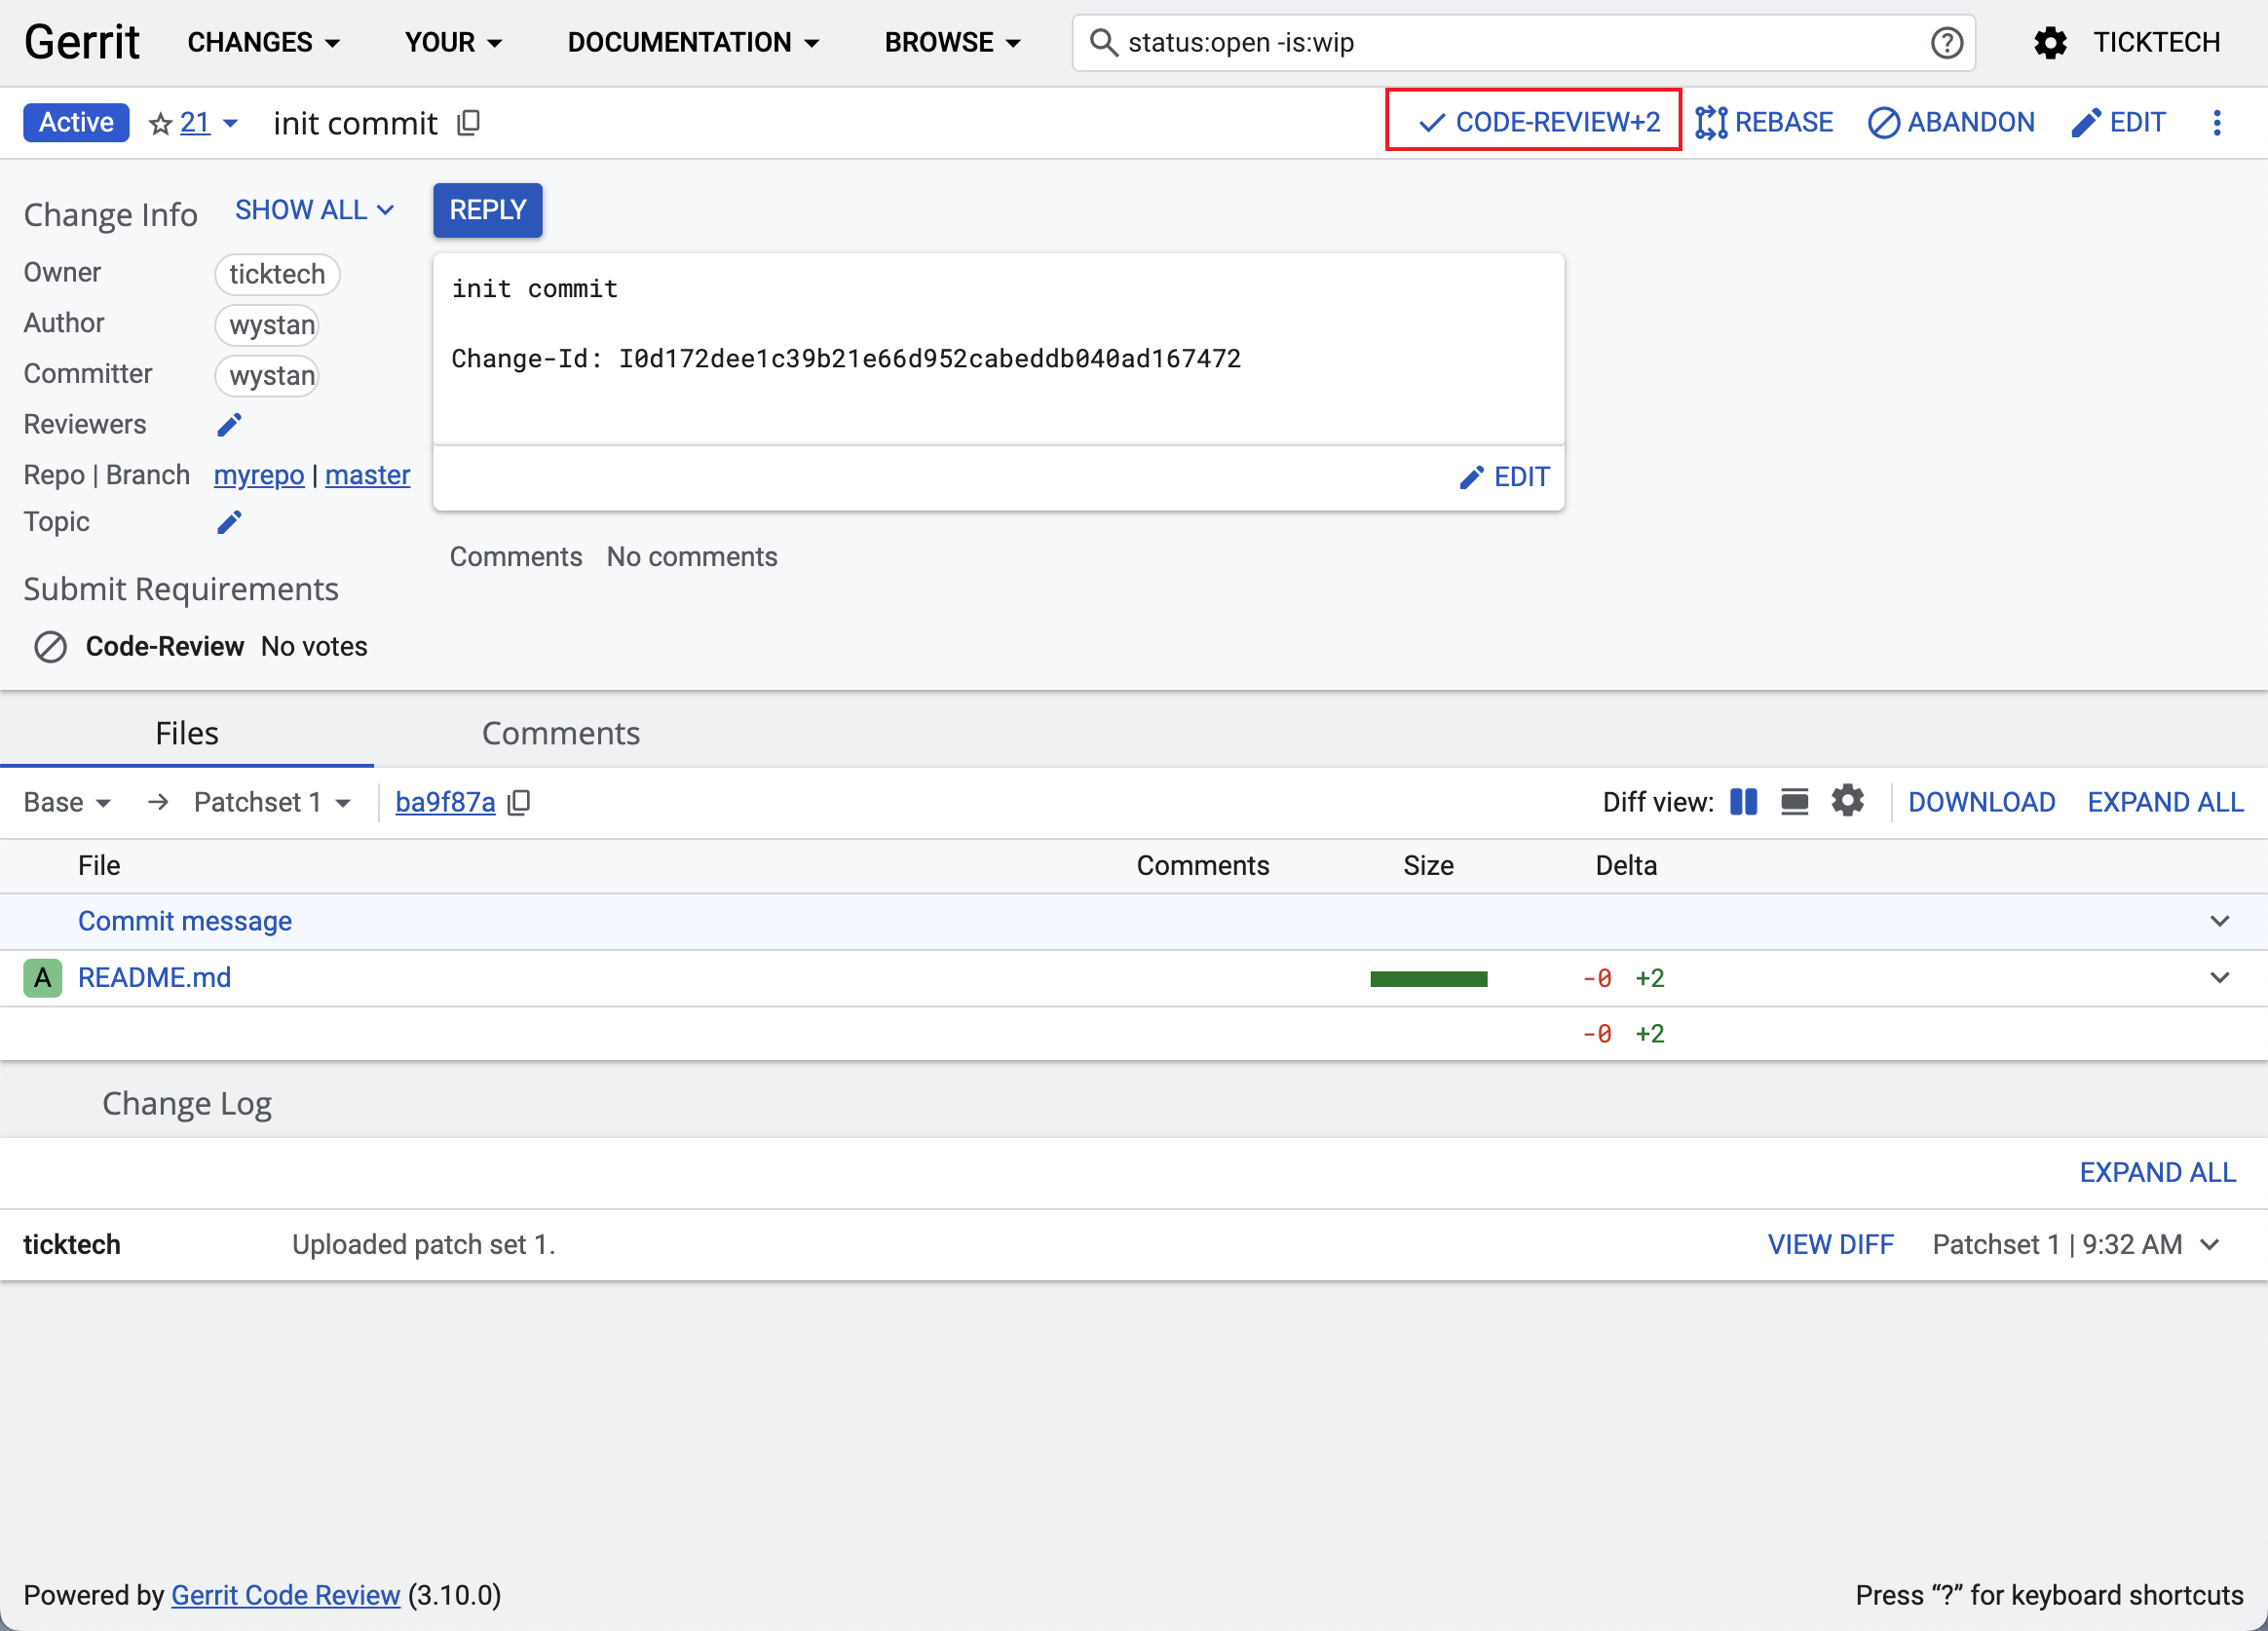
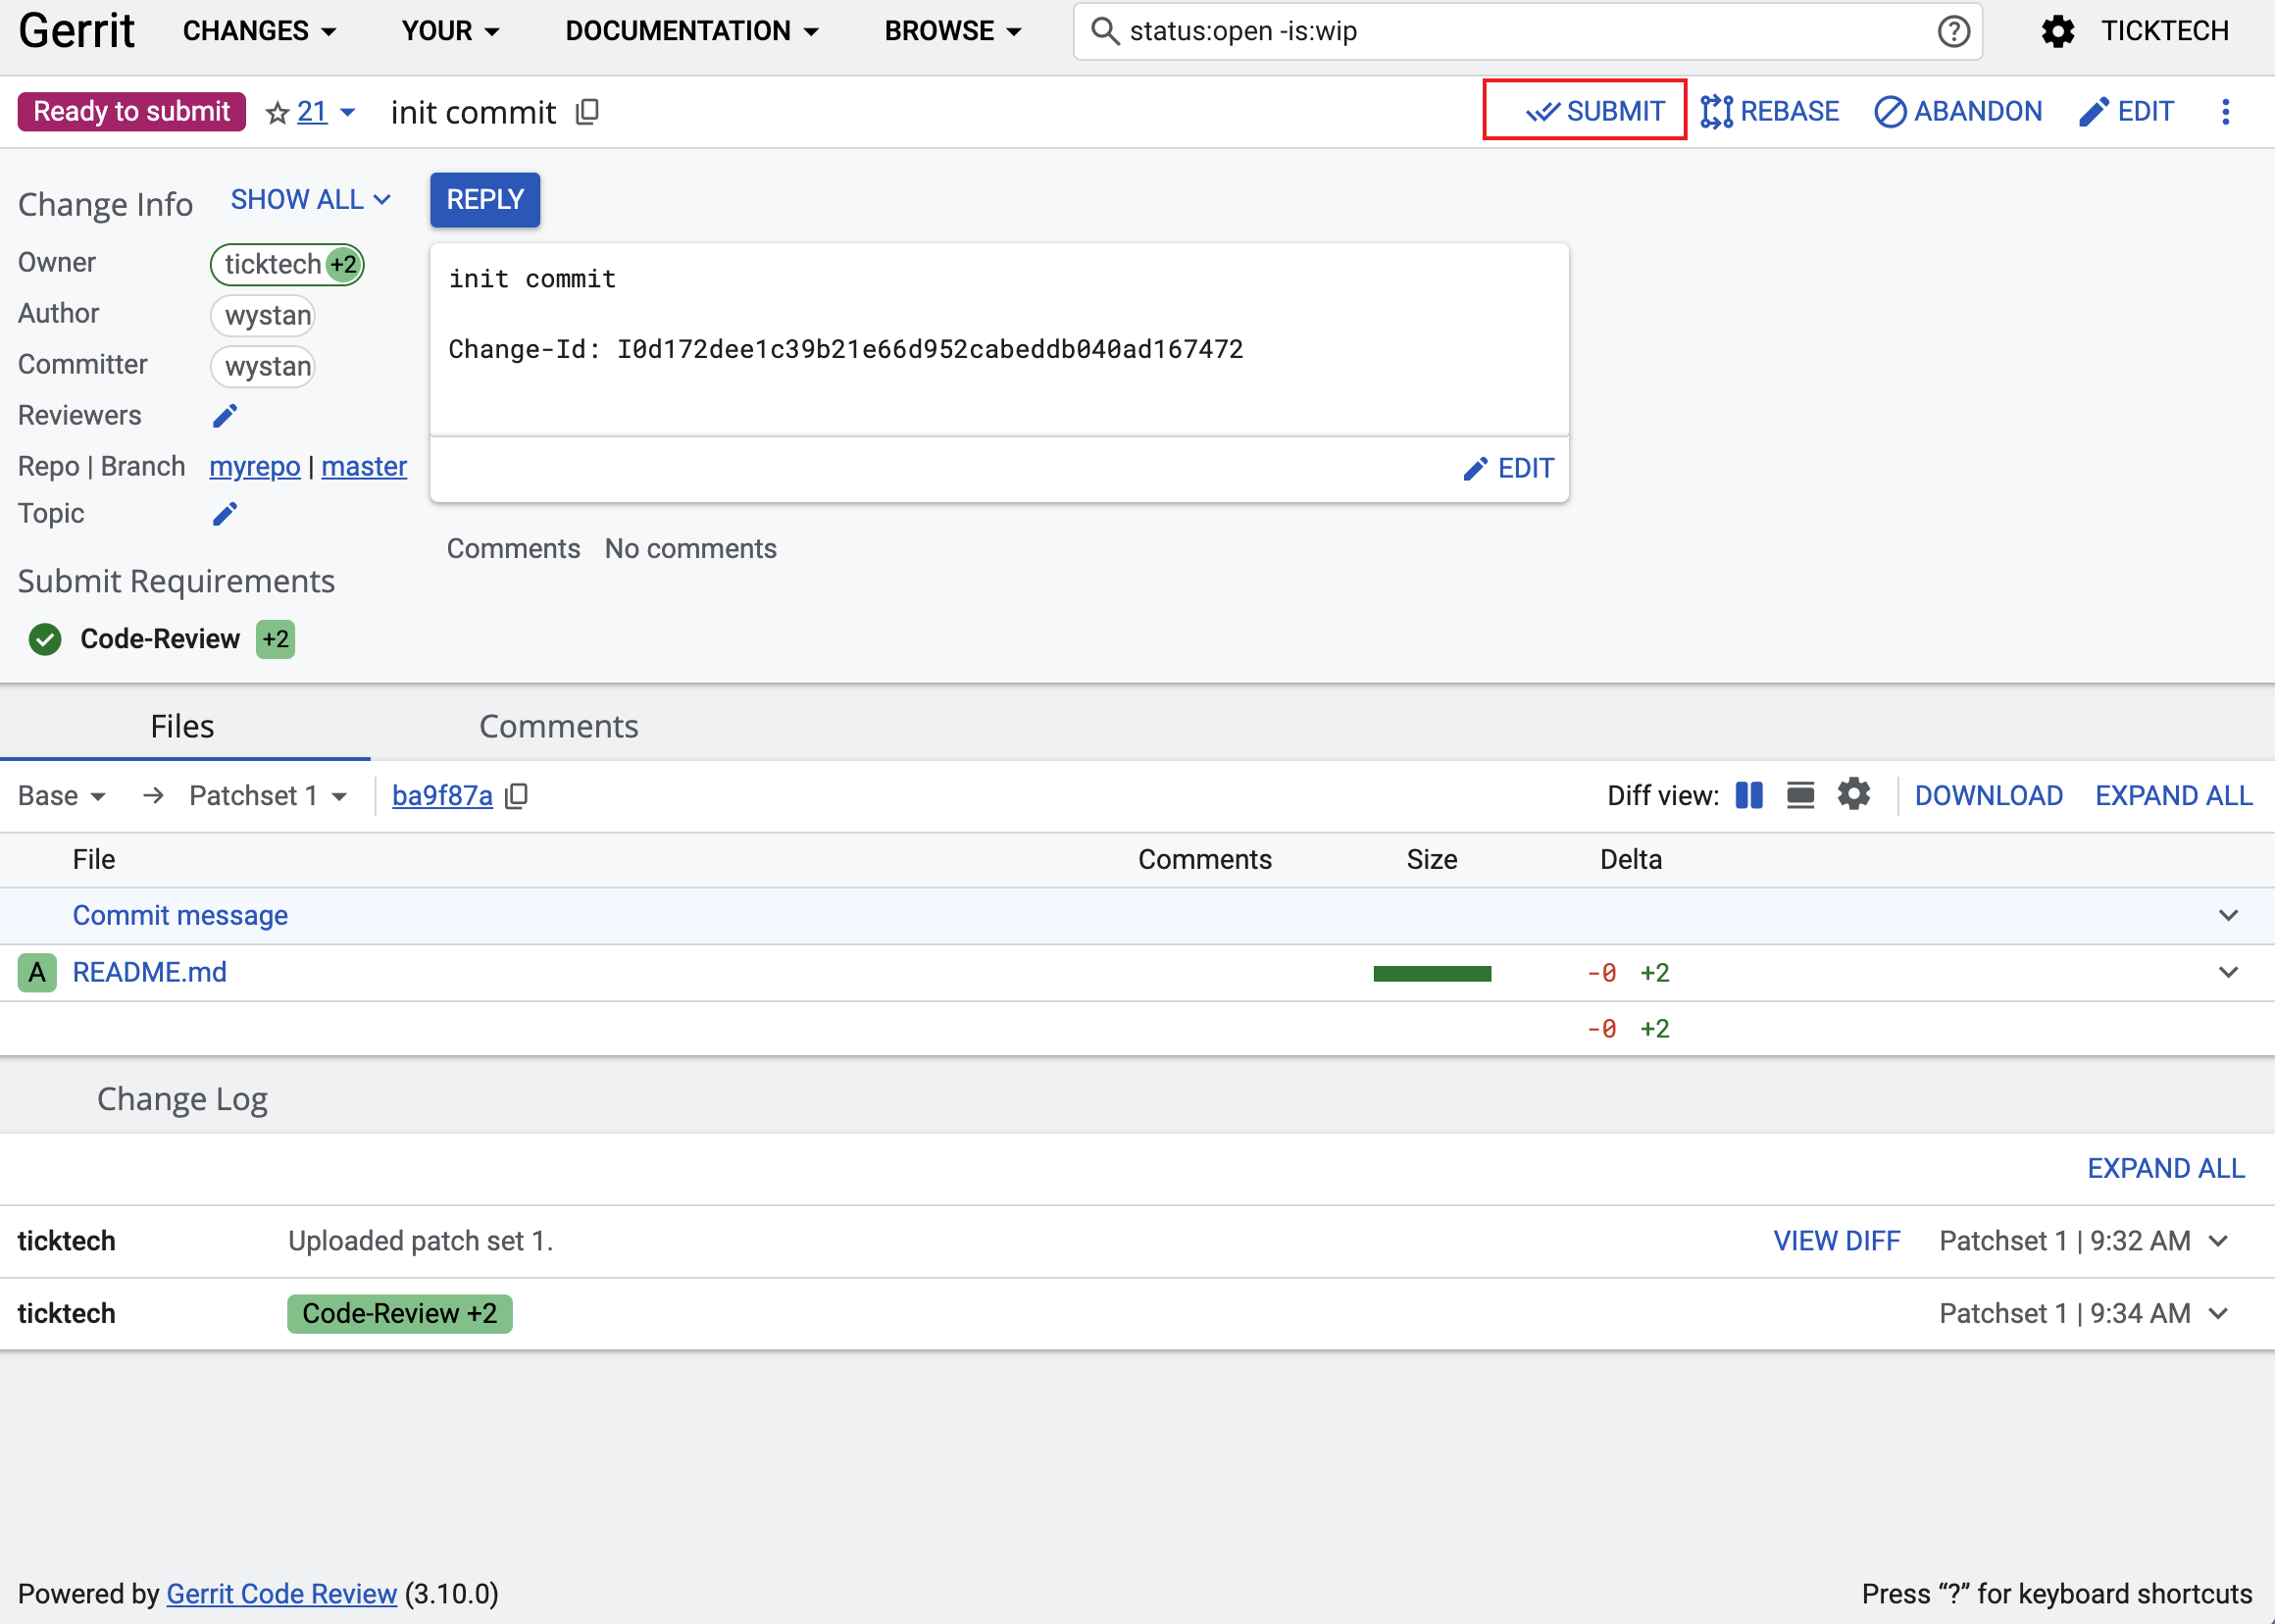
执行上面的操作后,代码并没有被提交到远端仓库中,而是需要code-review之后才可以。登陆你的gerrit:
点击菜单:[BROWSE] > [Repositories] > [CREATE NEW]
上面操作完成后,在git工作目录中执行git pull就可以下载到最新的代码了。
参考