在《Git使用-多仓库管理之submodule》中,我们介绍了使用git原生的submodule机制来管理多个仓库以及版本依赖关系,今天我们介绍另外一个工具repo,这个是Google为Android系统开发而打造的工具,也是小编最早接触过的多仓库管理工具,这个工具需要配合【gerrit】一起使用。
是什么

repo是Google开发的一套python脚本,前端命令是repo,同时提供了20多个子命令来管理多个仓库,包括下载代码、创建分支、提交代码、生成版本快照等功能。repo依赖manifest.xml来管理多个仓库的信息,这个XML文件存储在manifest.git仓库中。manifest.xml中记录了多个仓库的名称、远端仓库URL以及版本信息,repo命令负责解析manifest.xml文件内容,并根据用户输入的子命令进行处理。
安装
1
2
3
4
5
|
## ubuntu
sudo apt install -y repo

## macos
brew install repo
|
## ubuntu
sudo apt install -y repo
## macos
brew install repo
怎么用
下面是一个简单的工作流:
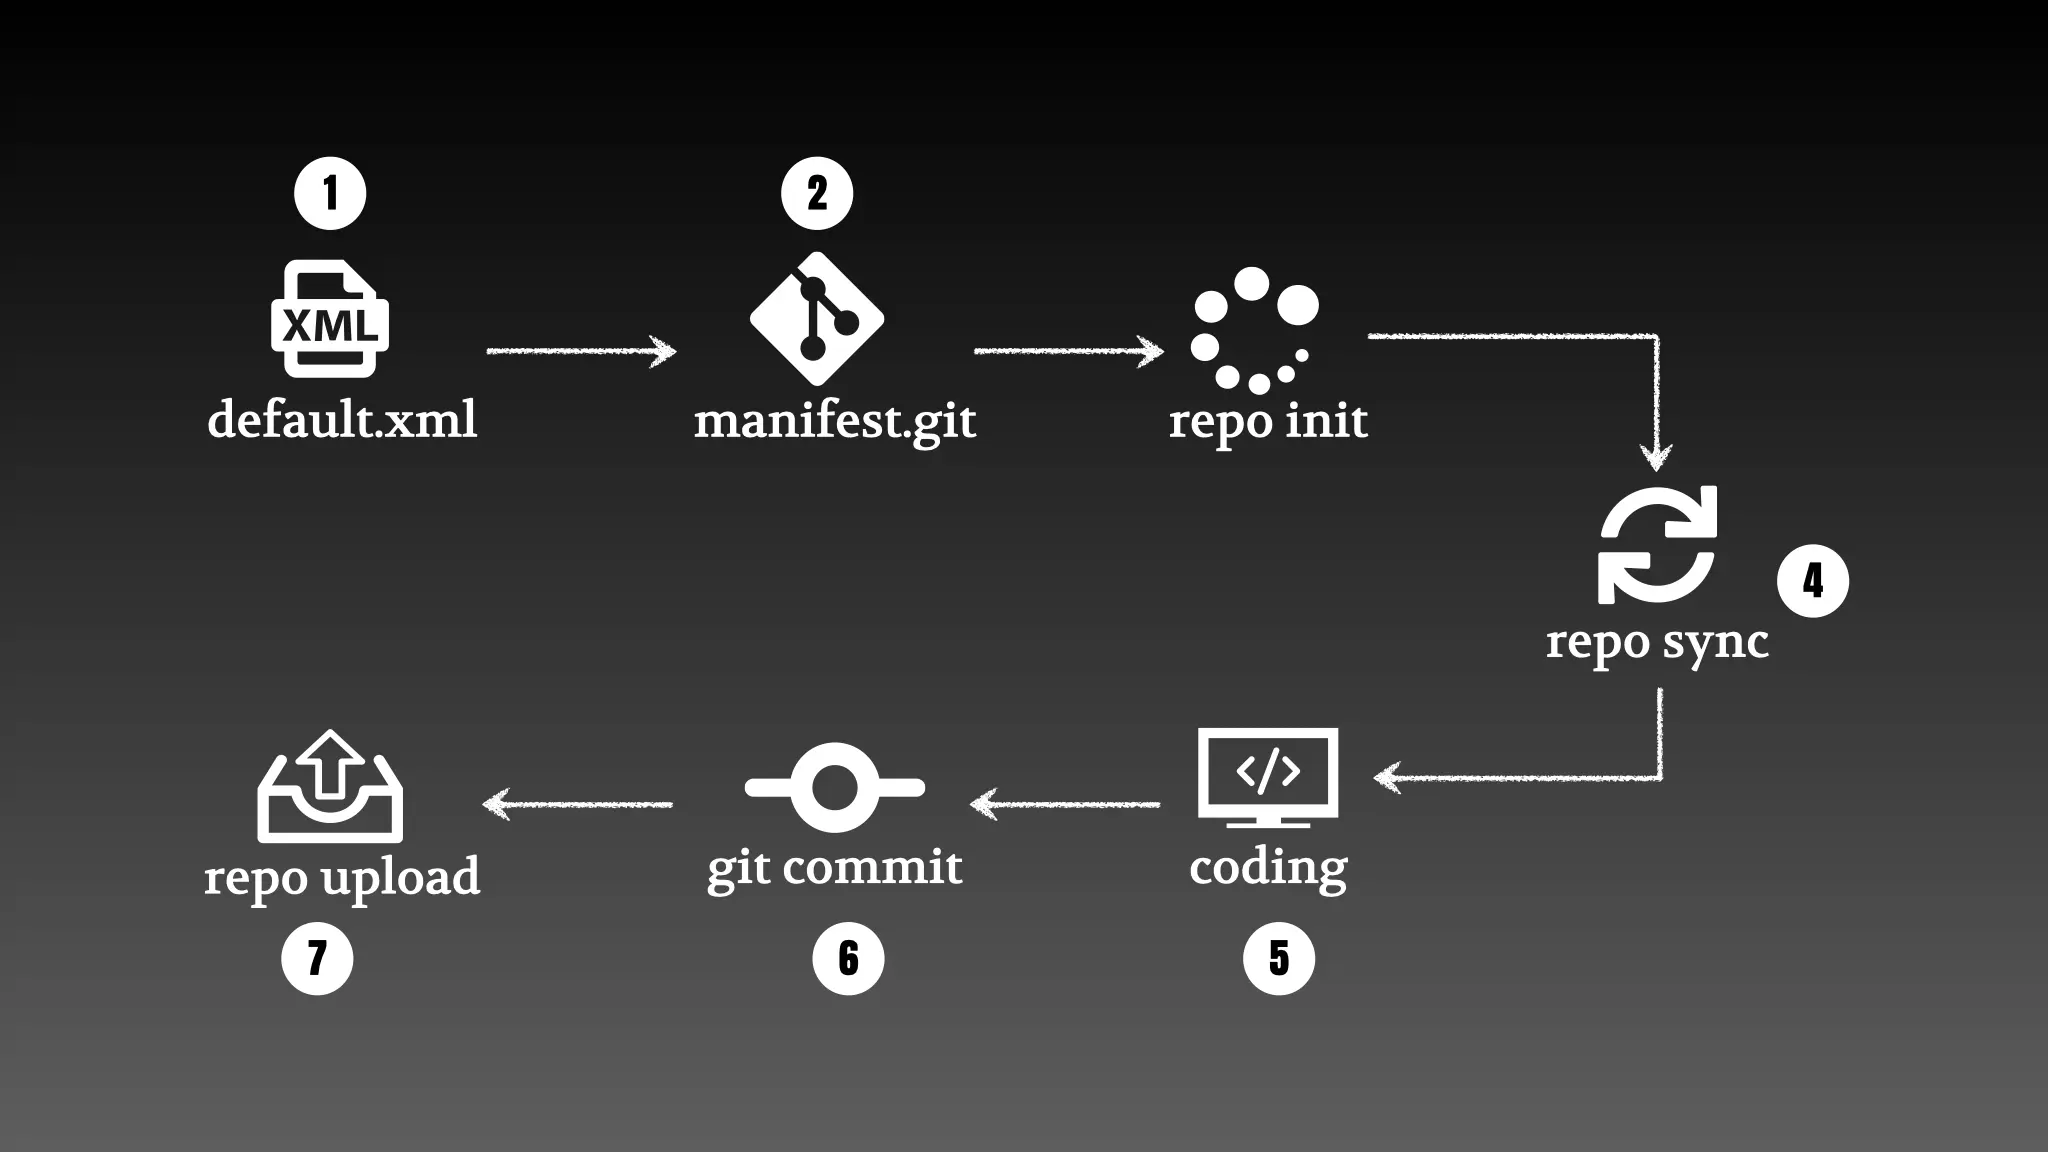
- 首先需要创建
default.xml文件,这是多仓库的配置文件
- 将
default.xml文件上传到manifest.git仓库中
- 使用
repo init命令初始化仓库
- 使用
repo sync下载所有仓库代码
- 修改代码、开发功能,解决问题等
- 使用
git commit提交到本地
- 使用
repo upload上传到远端仓库
下面是一个default.xml的例子:
 1
 2
 3
 4
 5
 6
 7
 8
 9
10
11
12
13
14
15
16
17
18
19
|
<?xml version="1.0" encoding="UTF-8"?>
<manifest>
  <remote  name="origin"
           fetch="https://gerrit1-url.com"
           revision="master"
           review="https://gerrit1-url.com" />
  <remote  name="gerrit2"
           fetch="https://gerrit2-url.com"
           revision="master"
           review="https://gerrit2-url.com" />
  <default remote="origin"
           revision="master"
           sync-j="4" />

  <project name="google/git-repo" path="git-repo" />
  <project name="ticktechman/blog" path="blog" />
  <project name="ticktechman/libarch" path="lib/libarch" remote="gerrit2" />
  <project name="ticktechman/libconn" path="lib/libconn" remote="gerrit2" />
</manifest>
|
<?xml version="1.0" encoding="UTF-8"?>
<manifest>
<remote name="origin"
fetch="https://gerrit1-url.com"
revision="master"
review="https://gerrit1-url.com" />
<remote name="gerrit2"
fetch="https://gerrit2-url.com"
revision="master"
review="https://gerrit2-url.com" />
<default remote="origin"
revision="master"
sync-j="4" />
<project name="google/git-repo" path="git-repo" />
<project name="ticktechman/blog" path="blog" />
<project name="ticktechman/libarch" path="lib/libarch" remote="gerrit2" />
<project name="ticktechman/libconn" path="lib/libconn" remote="gerrit2" />
</manifest>
下面是工作流相关的repo命令:
 1
 2
 3
 4
 5
 6
 7
 8
 9
10
11
12
13
14
15
16
17
18
19
20
21
22
23
|
## 下载代码
export REPO_URL="your-git-repo-url"
mkdir my-project && cd my-project
repo init -u <manifest-repo-url>
repo sync -j4

## 创建本地分支,开发功能
repo start --all local_dev
## coding
cd blog
git add .
git commit -m "feature: xxxx"

## 上传代码到远程服务器
repo upload --cbr blog

## 生成版本快照,并保存到manifest中
repo manifest -r -o snapshot-20240520.xml
mv snapshot-20240520.xml .repo/manifests/
cd .repo/manifests/
git add .
git commit -m "new snapshot of code"
git push origin HEAD:master
|
## 下载代码
export REPO_URL="your-git-repo-url"
mkdir my-project && cd my-project
repo init -u <manifest-repo-url>
repo sync -j4
## 创建本地分支,开发功能
repo start --all local_dev
## coding
cd blog
git add .
git commit -m "feature: xxxx"
## 上传代码到远程服务器
repo upload --cbr blog
## 生成版本快照,并保存到manifest中
repo manifest -r -o snapshot-20240520.xml
mv snapshot-20240520.xml .repo/manifests/
cd .repo/manifests/
git add .
git commit -m "new snapshot of code"
git push origin HEAD:master
参考